Sunday, May 31, 2015

Juicy Bits

I've yet another box to share this time, made with more of the fantastic Funky Hand designs from the CD "V. Funky

It's always good when you can combine 2 tasks into one project, isn't it?  Well as I had a project to make the Get Funky blog, and I wanted to wrap the "Established 1994" t-shirt I'd bought for the 21st birthday of one of my nephews in a more interesting way than just a sheet of paper, or even a regular "flat" box I looked around for something to cover both jobs.
 
Based on a milk carton style box, but in size more like a juice carton, this one stands 26cms high and the sides all measure about 10cms, so it's quite a chunky beast - and there's no hint at what could be inside! 
The t-shirt came folded up in a sealed plastic bag, so I rolled the whole thing up like a Swiss Roll and worked out how big to make the box.


Materials and Tools
"Boho Chic" from the Funky Hand  CD "V. Funky
the designs were all printed on textured white Bazzill card 
EK Success border punch to make decorative panel
For the tag:
More of the paper designs, printed in smaller sizes
Corner Rounder,
Pointed Circle dies and plain circle die (both Spellbinders)
Numerals are felted stick-ons (sorry, I can't remember the make)
Natural raffia
 
If you google "Milk Carton Box" you will find loads of basic templates and also video tutorials too.  As I needed this box to be much bigger, I half on each of 2 sheets of printed card (front and left side on one, back and right side on the other).  I also needed more height, so I only had enough card at the lower edge to make some flaps (about 1.5 cms), then cut two squares from plain card for the actual base of the box - by sandwiching the flaps between the 2 squares it made a neater and firmer base for the box
 
I had a moment of inspiration and printed the card with this great horizontal striped design -  which made lining up and joining the 2 pieces together ito make one box a breeze!


love these bright and bold colours and designs - I used more of them to make this card, which I blogged last week, but hey, here it is again ;)
 
Thanks for visiting today

Friday, May 29, 2015

2 Cute!

This week Sharon has set a challenge called "Mirror, Mirror" for The Daring Cardmakers,

I'd like to see mirror images on your cards, this can be mirror stamping, die-cuts or patterned papers featuring a mirror image.

As always the team have come up with some amazing inspiration for you, so please come and visit the blog to see what we've made

Well the stamping suggestion was a definite no-no - I can't even manage regular stamping with much competence, and I wouldn't know where to start do do mirror or reverse stamping!
What  I really fancied doing was some sort of mirrored layout, but I faffed around too long and run out of time for working something out.  So I had a quick search through my cutting files and decided to keep it simple with a "twins" card.  At least using the Cameo makes it very simple to clump all the little bits together and make a horizontal or vertical mirrored copy all ready to cut.

This is another template that's popped up a few times since I made it.  The drawback is having to draw the face, as you can see drawing is another of the things I can't do!

Materials and Tools
Smooth white card for base and for embossed panel
Skin-toned and white Bazzill card
Paper designs from Funky Hand "Twelve Crafters Crafting" CD 
Petite Dots embossing folder (Crafters Companion)
Border Punch (Martha Stewart)
Scraps of wool for hair
Pale pink satin narrow ribbon
Sentiment is pc generated
Cameo to cut the babies

Notes:
The Funky Hand CD was used to print the pink background  paper, and also the design for the t-shirts.  I shrank the starry paper so that it would print the design in a tiny 6x4cm and be in proportion for the little t-shirt shapes.
The other Mirrored element on my card is the decorative panel under the ribbon.  I punched the paper strip normally first,. then turned both punch and paper,  marked a line across the strip between 2 hearts and used as a guide for the next punch.  With the punch upside down you can line it all up in the little window.

It would be great if you'd join in with us this week - we'd love to see how you tackle Sharon's challenge!  Don't forget to pop over to see the rest of the cards by clicking HERE

Thank you for visiting, I hope you'll leave a message :)


Tuesday, May 26, 2015

Diamond Wedding

I had a commissioned card for a Diamond Wedding Anniversary to make recently.  Once again I've used the May sketch from the Sketch File Blog to base it on - it's such a lovely LO to go mad with lots of lovely embellishing bits and pieces!


Materials and Tools
Card: Centura Pearl White with a hint of Silver used for most layers
 Silver Glitter card behind first large square and sentiment banner
Die: "Lace Doily Motifs" (Spellbinders)
White lace, White organza ribbon
Various wired flowers and leaves,
 Pearl Spray, Crystal Spray
Silver Gems
Sentiment was printed on the pc then the "tails" cut by hand before matting onto silver glitter card
The finished sentiment banner was glued down in an arc to stand away slightly from the card
May LO from The Sketch File
I did make a few "tweaks" (but that's allowed), I added a couple of extra background layers, changed the main circle for a square, used on end to keep the diamond theme, and I added a banner sentiment. 


Thank you for visiting today, I hope you'll leave a comment


Saturday, May 23, 2015

Seeing Stars

I've used the May sketch from the Sketch File Blog to make this card.
The papers are from the Boho Chic set from the Funky Hand CD V.Funky and I love their strong, vibrant shades

Materials and Tools
Papers: "Boho Chic" from the Funky Hand  CD "V. Funky
the designs were all printed on textured white Bazzill card 
EK Success border punch
Plain circle die set (Spellbinders)
Nested Star die set (Taylored Expressions) 
Tiny star punch

May LO from The Sketch File


I moved the smaller circles to the lower corner and swapped the bow for a mini stack of stars so that this card has a more masculine feel and will be just the ticket for the next of the nephews' birthdays

Thank you for visiting today, I hope you'll leave a comment


Friday, May 22, 2015

Hitting the Improbablity Drive button

"Curiously enough, the only thing that went through the mind of the bowl of petunias as it fell was Oh no, not again. Many people have speculated that if we knew exactly why the bowl of petunias had thought that we would know a lot more about the nature of the Universe than we do now"

 It's Svenja's turn to set the challenge for the Daring Cardmakers this week and as it's quite a significant day for her (Happy Birthday Svenja) she's gone with this:

"I have the ominous 42 to celebrate today and it's Towel Day on Monday. Two good reasons to celebrate the works of the great Douglas Adams with some
Science Fiction themed cards. 
But of course you're just as welcome to celebrate any other sci-fi hero of your choice: Dr. Who, Mr. Spock, Princess Leia, R2D2... to name but a few. Who is your favourite space alien?

As I have my very own resident Douglas Adams geek I obviously had to turn to him for advice and ideas.  He/We eventually came up with using the scene "the sperm whale and the bowl of petunias" (click the link to read the scene in question!) - after a bit of mulling over what was possible for me to do, and him having a really good excuse to delve into the "Hitchhiker's Guide to the Galaxy" DVD set to show me the bit in question and the relevance, background etc (oh yes, such things are important.....of course you need to watch it).  


Materials and Tools
White card
Bazzill card scraps: Blue, Green various Yellows
Whale image printed direct to the card (I should have made the image bigger and maybe will alter it anyway)
Bowl cut with a circle die
I made a template for the Petunia flower and cut them with the Cameo
Lettering and Thought bubble also Cameo-cut
Leaves are from a leafy swirl die (Spellbinders)
Sharpie Black pen for outlining
Black gel pen for drawing around edge of card
Dots of Stickles Glitter Glue

If you want to know more about the madness that is "The Hitchhiker's Guide to the Galaxy" just paste that into Google and you'll find plenty of info and video clips.  
I had a "whale" of a time just reading through some of the fantastic quotes from Douglas Adams and his books
A sadly missed, clever, funny man

Thanks for popping in, and do visit the Daring Cardmakers BLOG as there are some really amazing Sci-Fi inspired cards on there this week

Wednesday, May 20, 2015

Gift Bag and Tag


Hi, this time I've a gift bag to share with you - it's another Funky Hand project, so you'll find it over on the Get Funky Inspiration Blog too - it's worth jumping over there as there's a new project every day!

I've used  "Spring Morning" designs from this month's showcase CD "V. Funky to make this one, and it's nice and easy because I've used an Xcut die to make the bag, then made it "my own" with a hand cut tab and tie closure and a different tag from the one you get in the die set


Materials and Tools
"Spring Morning" from the Funky Hand  CD "V. Funky
the designs were all printed onto "Diamond White" Bazzill card, which has a lovely soft sheen to it (but makes photographing difficult!)
Gift Bag die set (Xcut)
Tab closure is hand cut
EK Success border punch
Tag die (the top part is a Crafters Companion die, but I prefer straight sides so trimmed it down)
the Flower on the tag is made with this paper from the set:
I cropped, resized and printed just a section of the paper in 2 sizes and coloured the petals with 2 colours from the Spring Morning collection, then cut the flowers out by hand
Tiny circle punch (Xcut)
Bakers Twine

I hope you like it - my tip for today is to experiment at printing on different kinds of paper and card - you'll find lots of new ways to use your Funky Hand stash!


Friday, May 15, 2015

Yellow, Yellow and More Yellow

It's Beckie's turn to set the challenge for the Daring Cardmakers and this is what she came up with;
MONOCHROMATIC RAINBOW

I think everyone, not matter what age, likes to see a rainbow in the sky.  I often look for them when the rain has been and the sun comes out.
 For this dare I would like you to choose ONE colour from the rainbow and use ONLY that colour on the card. 
No other colour maybe used, even the card blank must be in the same family colour.
An ARC must also be used on the card.
I decided to use yellow.  Despite it being one of my favourites (especially for it's instant  "cheer up" factor), its a colour that I don't use often enough, so this was a good opportunity to use lots of it!

For the arc element Beckie requested I added a flip up section and put the sentiment underneath it


Materials and Tools
Various yellow card from Bazzill and Coredinations 
Dies: Flap cut with the largest of the giant circles die set by XCut
Large butterdly and butterfly border both Memory Box
Swirl (DieNamics) 
Doily Circle under the flap (Sweet Dixie)
Border punch (EK Success)
Embossing folder; Petite Dors (Crafters Companion)
Pearls and Enamel dots
Cameo to cut sentiment
I cut  the butterfly border a few times in different shades and then used my craft knife to detach some extra smaller butterflies and flowers for decorating any spaces, and adding dimension to thones on the actual border.

What this dare has shown me is that I need to invest in more yellow card!

Please pop along to the Daring Cardmakers Blog and see the beautiful cards made by the team this week - and of course, we'd love it if you'd join in and give this challenge a try


Thursday, May 14, 2015

A No-Glue, Slim Box

This is another of my projects for Funky Hand's Get Funky blog using this month's showcase CD  "V. Funky" 


I received some cookery ingredients through the post recently - they are cleverly packaged so that the larger box fits through a regular letterbox, and in that box are four smaller ones. 
These little, plain kraft-coloured boxes are very cute and tbh, just "crying out" to be used as a template for something prettier.  A task made easier because there's no glue or anything holding these boxes together, they just unfold and are ready to trace around!

Although the box is made from my "drawn around" template, I've also made sure to save it in my Cameo files so that I can not only use it again, but scale it up or down in size too

I've used "Thyme Blossoms" designs from  "V. Funky" to make this one - printed on both sides of my sheet of textured white Bazzill card so it's pretty inside as well as out. Here you can see it all unfolded
 
I made a "belly band"  not only to keep the box closed, but also by cutting out and layering a couple of flowers from one of the paper designs, it's the decoration too


Materials and Tools

Papers: "Thyme Blossoms" from the Funky Hand  V.Funky  CD
the designs were all printed on textured white Bazzill card 
EK Success border punch
....and then I made a small 10cm square gift card to match, using another cut out flower, some pearls and a piece of Bakers' Twine

Using digital paper designs with white card instead of papers opens up a whole new area of possibilities for making little bags and boxes.  I even prefer printing onto textured card when I'm just making cards too as I love the luxury look and feel of the extra weight and the texture - and with various different texture styles available, that's even more to play with!

That's all for this time, Thank you for visiting

Monday, May 11, 2015

All Gold.

Today's card is another Golden Wedding Anniversary card, made a couple of months ago for a commission, but using this  month's sketch from The Sketch File Blog.  Does that sound as confusing to you as it does to me?   I guess all it really means is that I knew what the May sketch would be well in advance and was able to do a 2birds, 1stone kind of trick ;)

 Materials and Tools
Smooth White card blank plus extra for layering  and die cuts
Gold card for layering and names
White satin ribbon, Gold organza ribbon
White cotton lace
Various wired flowers, leaves, pearl spray
Gold and white gems and pearls 
Gold "50" charm
Catalina Wreath die (Memory Box)
Plain circle and names cut using Silhouette Cameo
May Sketch
It's like revisiting an old friend making a card like this, and I enjoyed myself immensely!  I love getting all the ribbons, lace and flowers out and layering them all up together.  This card, although it has such a lot of "ingredients" was much easier and quicker to do than some of the more pared down ones I've done lately. 
Anyway, I hope my customer, and the eventual recipients liked it, because I enjoyed making it!
Thanks for visiting today, please come back soon

Friday, May 08, 2015

Through the Garden Gate

Here in the UK it was polling day yesterday, but don't worry I'm not going to start on a political rant....
No, it was just the thought of a possible new resident for no 10 Downing Street that sparked off Leo's idea for this week's challenge to the Daring Cardmakers
 The Door To.................
Inspired by election day and No.10 I'd like you to include some kind of opening door on your card. It could be a simple interactive opening fixed somewhere on your card or your card could have a fancy way of opening or you could make the whole card a door shape, whatever you can come up with.
Here's my Through the Garden Gate card

Materials and Tools
Card front papers: "Springtime" Echo Park (very old!)
Bazzill card; White and Turquoise 
Inside papers; various Websters Pages 6x6  (also old!)
Embossing folders: Brick pattern (Darice) for wall . Distressed Stripes (Cuttlebug) for gate
Die: Catalina Wreath (Memory Box), cut into pieces to make the trailing plants
"welcome" sign is hand written, Twine
Brad

There's a bit of a party going on in the garden, with a gazebo and a table full of cakes....
Please pop over to the DCM blog to see what the design team has come up with this week - they are fab!


Tuesday, May 05, 2015

Take one "Curiously Strong Mints" Tin.....

It was another of my posting days for Funky Hand's Get Funky blog yesterday but we were out enjoying the sunshine so I'm posting it here today.

During May we're showcasing the CD "V. Funky" which is also on special offer in the shop and definitely worth grabbing as you'll find masses of papers on this CD in a wide variety of colour-ways, plus a few "extras" too

My tin started out as one of those little mint tins from Marks and Spencer and after a bit of work with alcohol inks and some lovely papers from the "Cottage Linens" section of the CD for this project it ended up like this


Materials and Tools

Papers: "Cottage Linens" from the Funky Hand  V.Funky  CD
the designs were all printed on textured white Bazzill card 
Blossom Flower Punch (SU)
Leaf Swirl die (Spellbinders) 
Corner Rounder punch
Ribbon, Cream Cotton Lace. 
Pearls (tinted blue with Promarker pen) Ink for edging
Alcohol Inks to colour the tin

Here's how the tin looked before I attacked it:


 I used some dark coloured Alcohol Inks around the sides and any other bits I thought might show once the tin was finished.  I also added some ink to the inside of the tin as it seemed a bit too shiny!


I love these Cottage Linens papers! The designs are lovely. but the colours are beautiful: so soft and delicate with a bit of a "Shabby Chic" feel to them - 

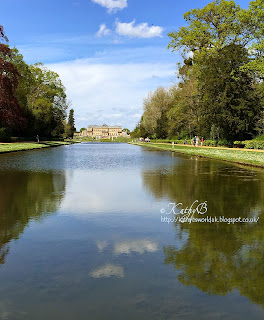
I thought I'd add a few photos from yesterday's trip over to Wrest Park, which is an English Heritage property in Silsoe, Bedfordshire, and one of our favourite places to visit


Absolutely love the garden wall with the beautiful wisteria on it!

Thanks for visiting today

Friday, May 01, 2015

Elemental May

Over at the Daring Cardmakers blog, it's time for May's Elemental Inspiration Challenge.
With a bit of continuation of last week's weather theme,  the Elemental Inspiration picture chosen by Lythan has a weather connection as well - its a picture of a windy day!
As ever the challenge is to create a card which has at least 3 elements from the  picture on it.
It could be the colour scheme, the Layout, the theme of the picture or some of the shapes. It's all about taking a good look at the picture then using what you see to get creative in your own style.


I was absolutely convinced I had some windy day themed paper somewhere in my stash but I couldn't find it anywhere, however I did find this cute paper which had a border of little houses, so I used that instead.
Obviously, once the card was finished and I'd moved on to making something else, that windy day paper did turn up....and yes, it was in the box I'd looked through twice.....
Materials and Tools
Background; Distress inks used directly onto the card blank, various shades of grey, blue-grey and greens 
Paper is a border strip from an old Nikki Sivils paper pad
Various card scraps
Little girl is my own template, cut on the Silhouette Cameo
Kite and triangles for tail are had cut
Bakers Twine

The template is another one I made ages ago that has had outings from time to time since. I like this one, and the one I used last week because there are no faces to be drawn!
The original version has a really oversized "cutesy" head but for this one I just resized the hair for cutting a more realistic size
Here's Lythan's fab picture: 
I chose the following elements: Background LO, Kite, Houses, Trees, Little Girl


Head over to the blog to see how other members of the team have used the elements from the picture this time.

Thanks for looking